
Appearance
AdminDefinitions, paths & steps
The definition is the structural template behind a cycle. It holds the paths a user can take and the steps they'll complete.
Open the definition
Click Manage Definition on any cycle row. The definition editor opens as a full-screen modal.
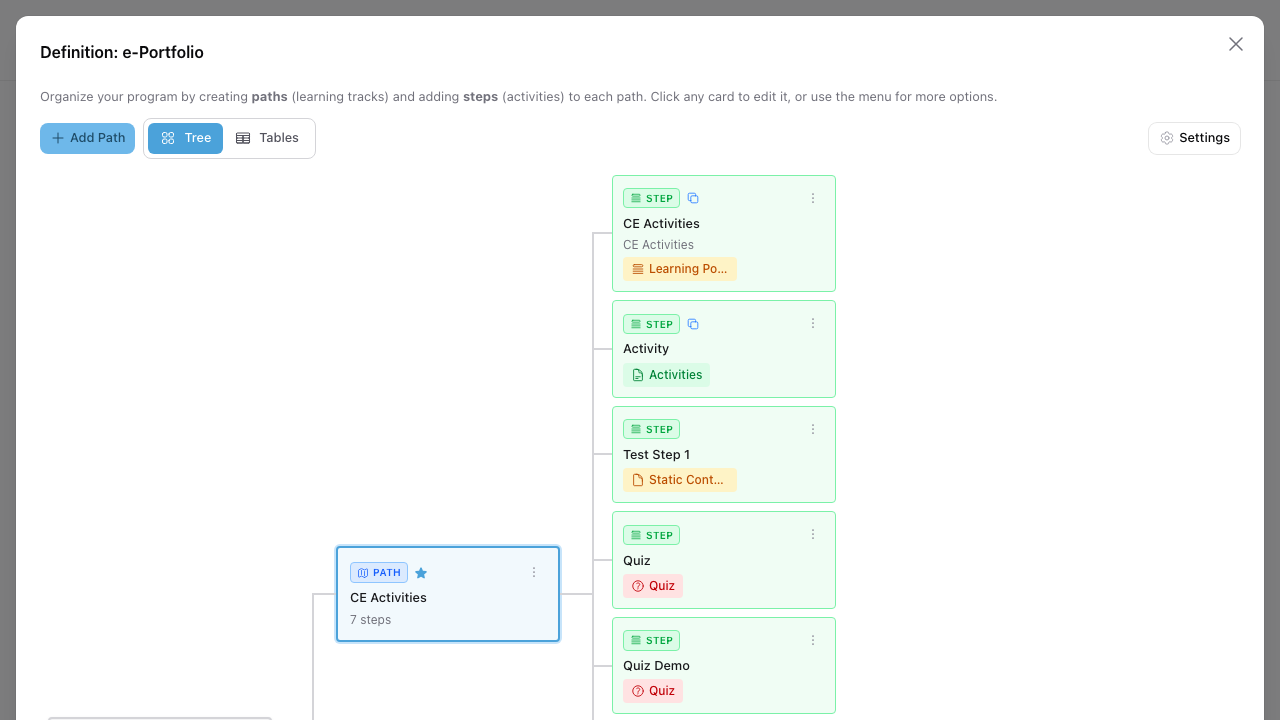 Definition → Tree view. Paths sit in the centre column; steps fan out to the right. Click any card to edit it.
Two views toggle in the toolbar:
- Tree — a visual layout of paths and their steps. Best for understanding flow and adding/reordering items.
- Tables — flat tables of all paths and all steps. Best for bulk edits and seeing details like Required, Prerequisites, and assigned Roles.
Tables view: see everything at a glance
Switch to Tables when you need to scan many paths or steps at once.
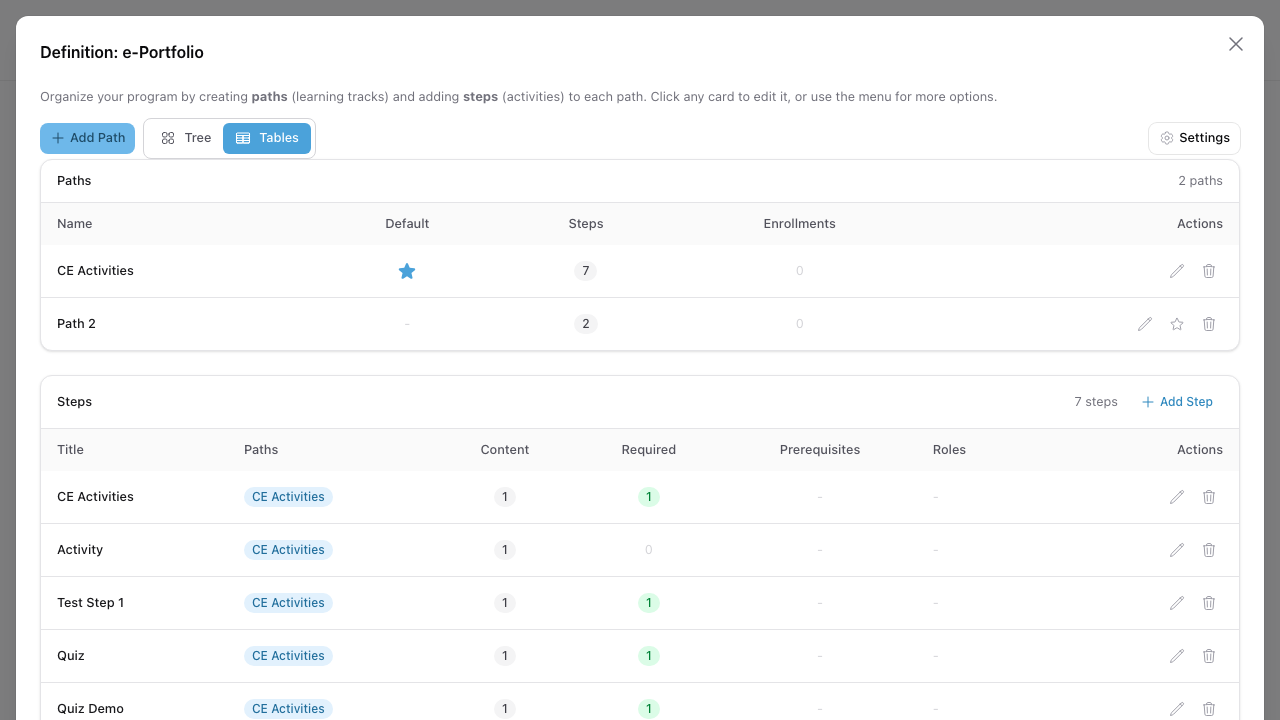 Definition → Tables view. The Paths table shows which path is default; the Steps table shows every step with its membership and gating flags.
- Paths table columns: Name, Default (one path is marked with a star), Steps, Enrollments.
- Steps table columns: Title, Paths (a step can live on more than one path), Content count, Required, Prerequisites, Roles.
Configure a path
Click Edit on a path to open the path editor — two tabs: Path and Path Conditions.
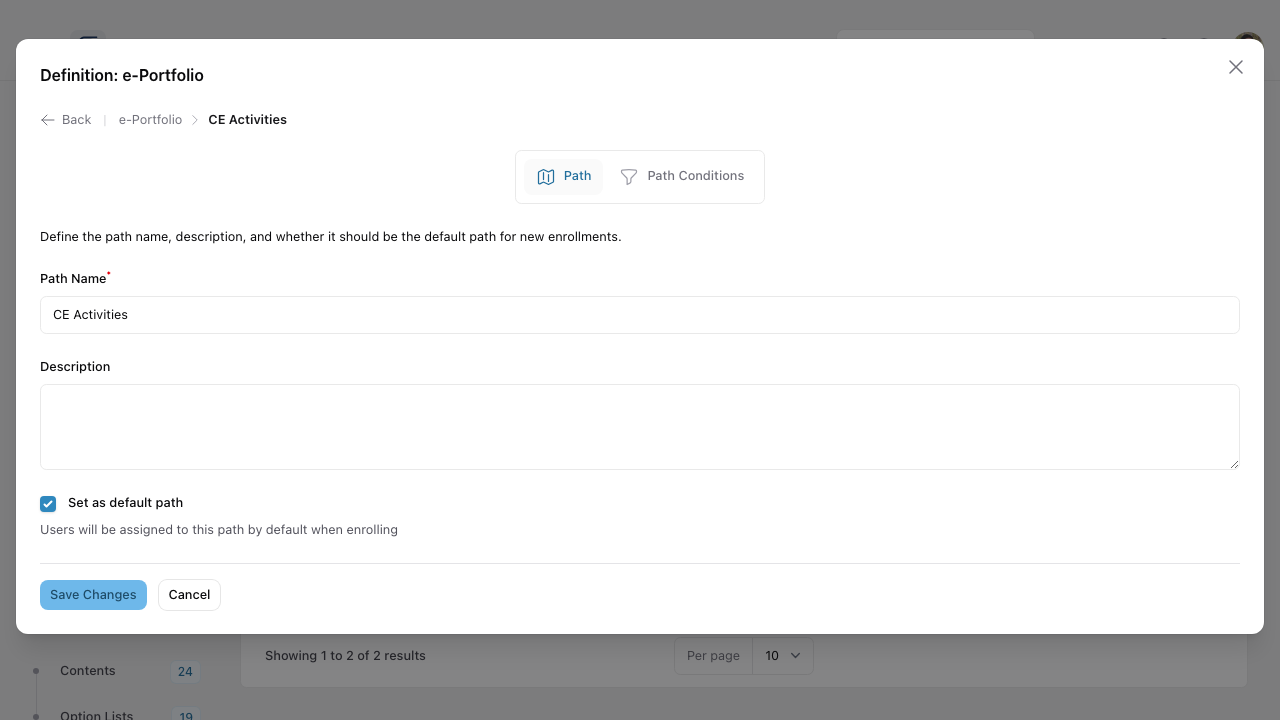 Path tab. Name, description, and a default flag — users are assigned to the default path when they enrol unless conditions override that.
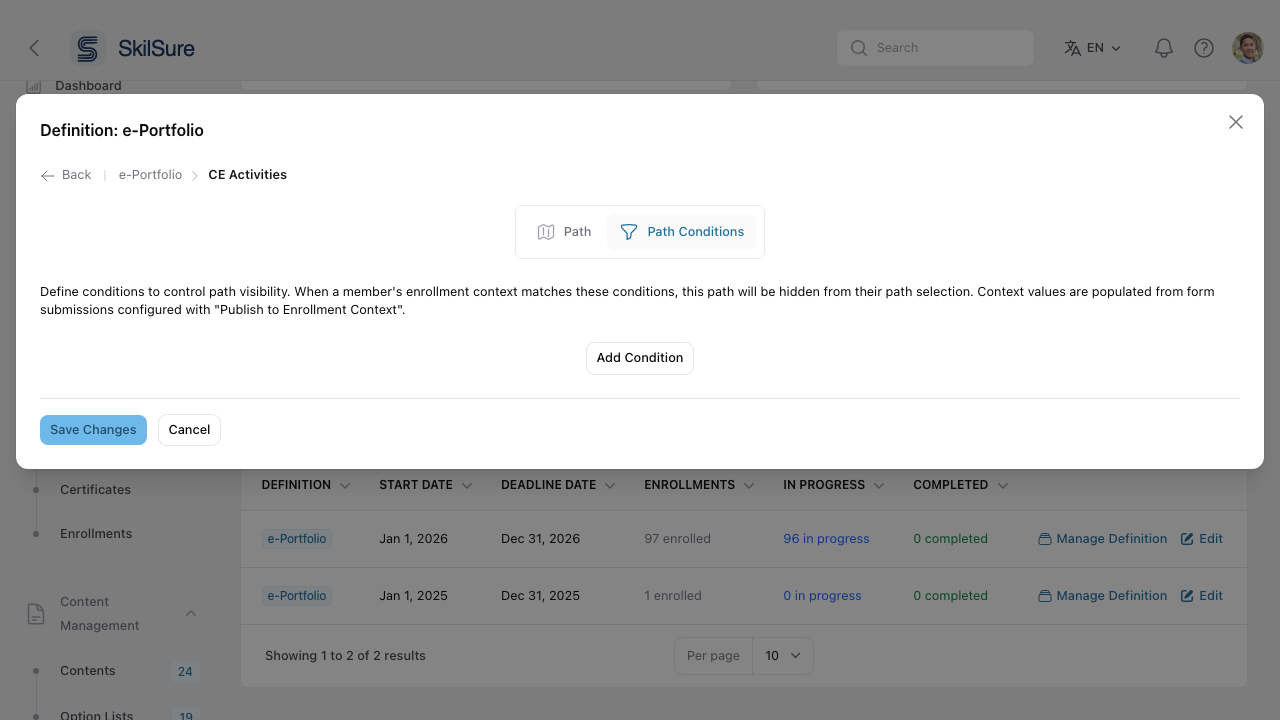 Path Conditions tab. Hide a path from users whose enrollment context doesn't match — useful when different roles or cohorts should see different tracks.
Path Conditions let you control path visibility based on enrollment context — values populated by form submissions earlier in the program. For example: only show an advanced path to users whose form submission set their experience level to Senior.
Configure a step
Click Edit on a step. The editor opens with tabs covering everything from content to sign-off.
Step tab — basics & content
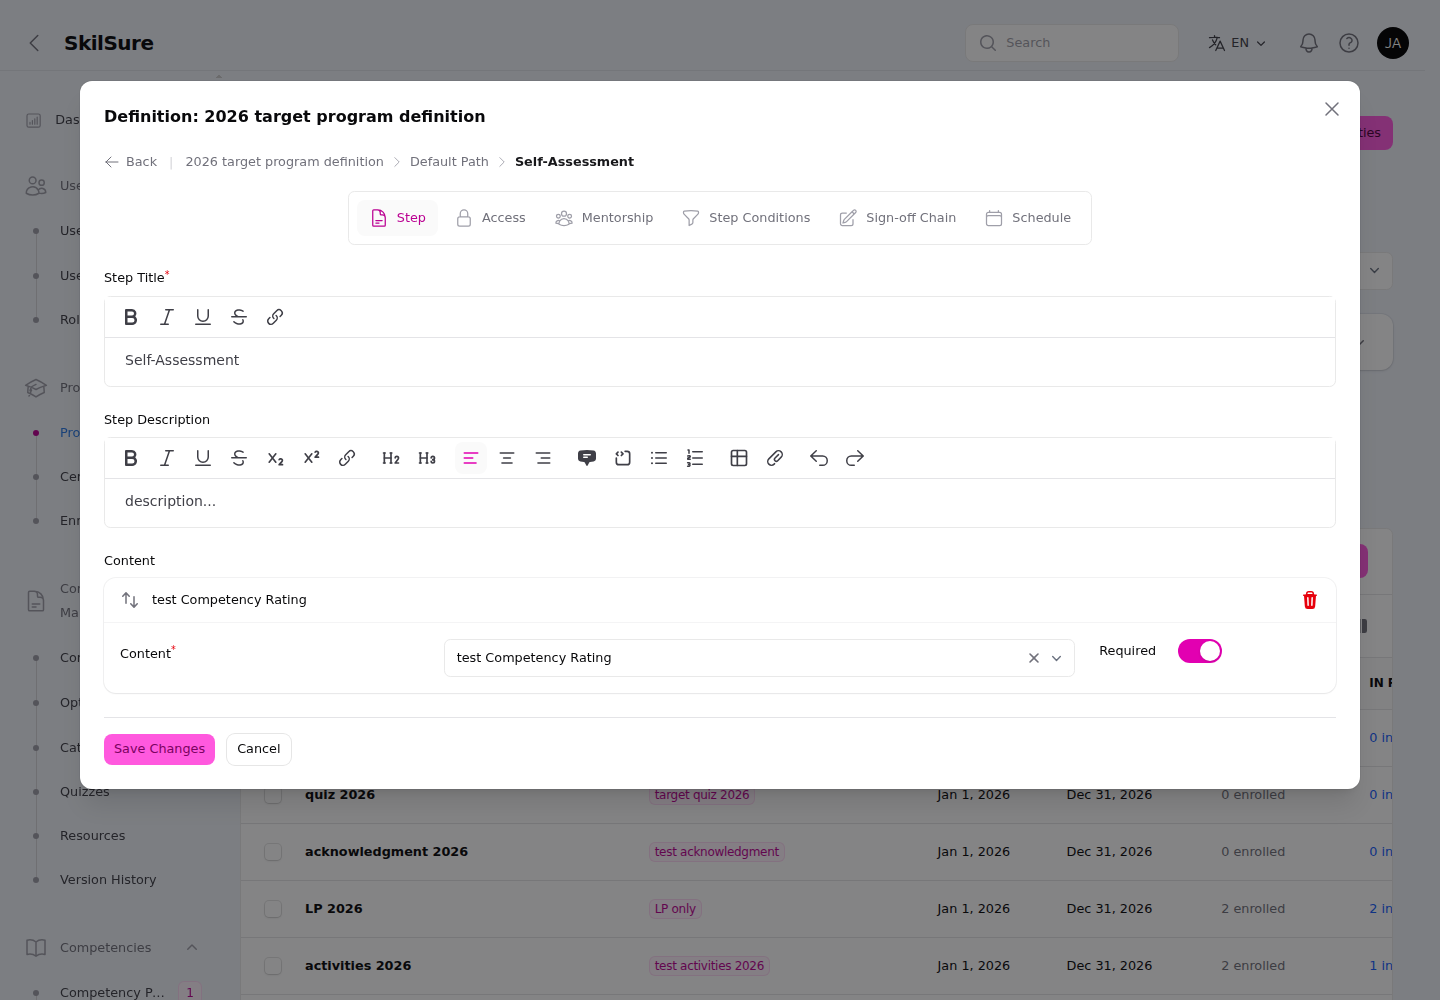 Step tab. Title and description are rich-text editors; below them you pick the content this step delivers and set a Required toggle for completion gating.
- Step Title and Step Description — both are rich-text editors with multi-language support. The title and description you write here become the header at the top of the step in the user view, shown consistently across every content type.
- Content — pick the content item this step delivers (Static Content, Video, Quiz, Activities, Learning Portfolio, etc.). A step can carry multiple content rows. Each content row has a Required toggle.
One header per step
You no longer set a separate title and description on each content module. The step's title and description render once, as the step header, above whatever content the step delivers.
What makes a step required
A step counts as required when it has at least one required content item. A step with no content (an information-only step) is treated as optional. Required steps drive the program's progress bar and completion — optional steps don't.
Access tab — who sees it and when
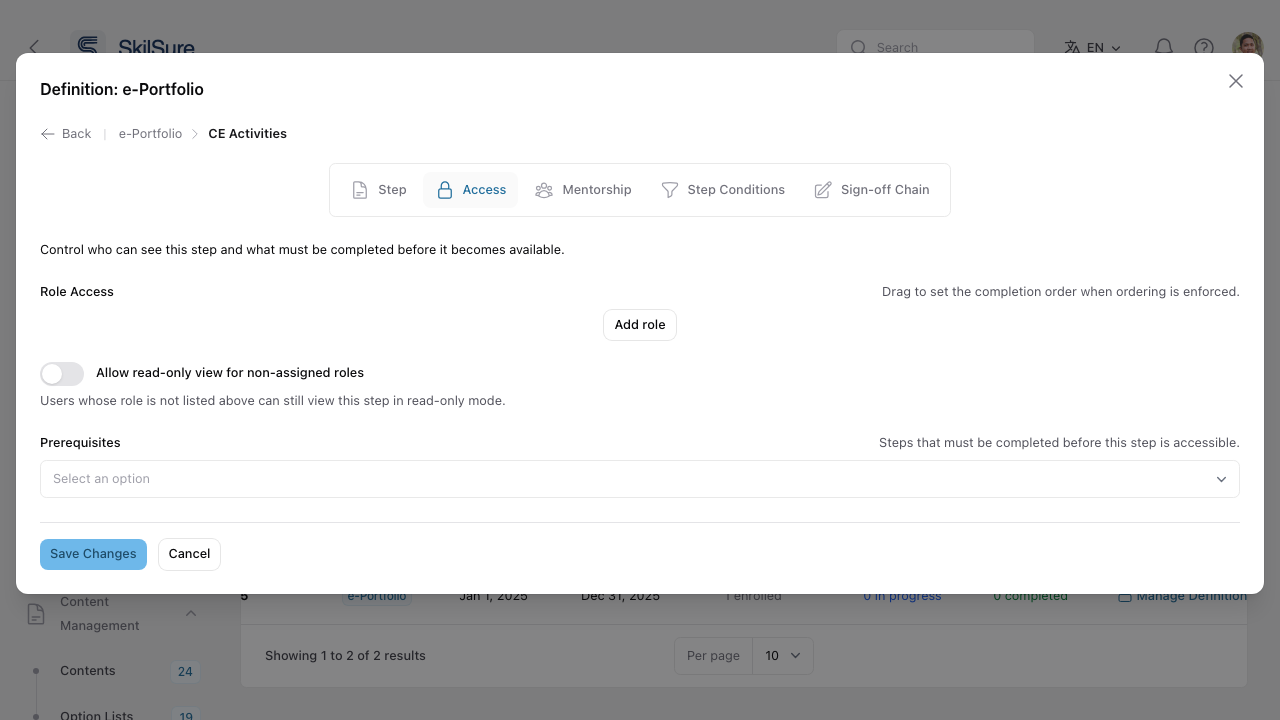 Access tab. Limit a step to specific roles, allow read-only viewing for others, and require completion of earlier steps.
- Role Access — restrict the step to certain roles (Member, Reviewer, etc.). Drag to set the order if ordering is enforced.
- Allow read-only view for non-assigned roles — others can see the step but can't act on it.
- Prerequisites — other steps that must be completed first.
Mentorship tab — require review
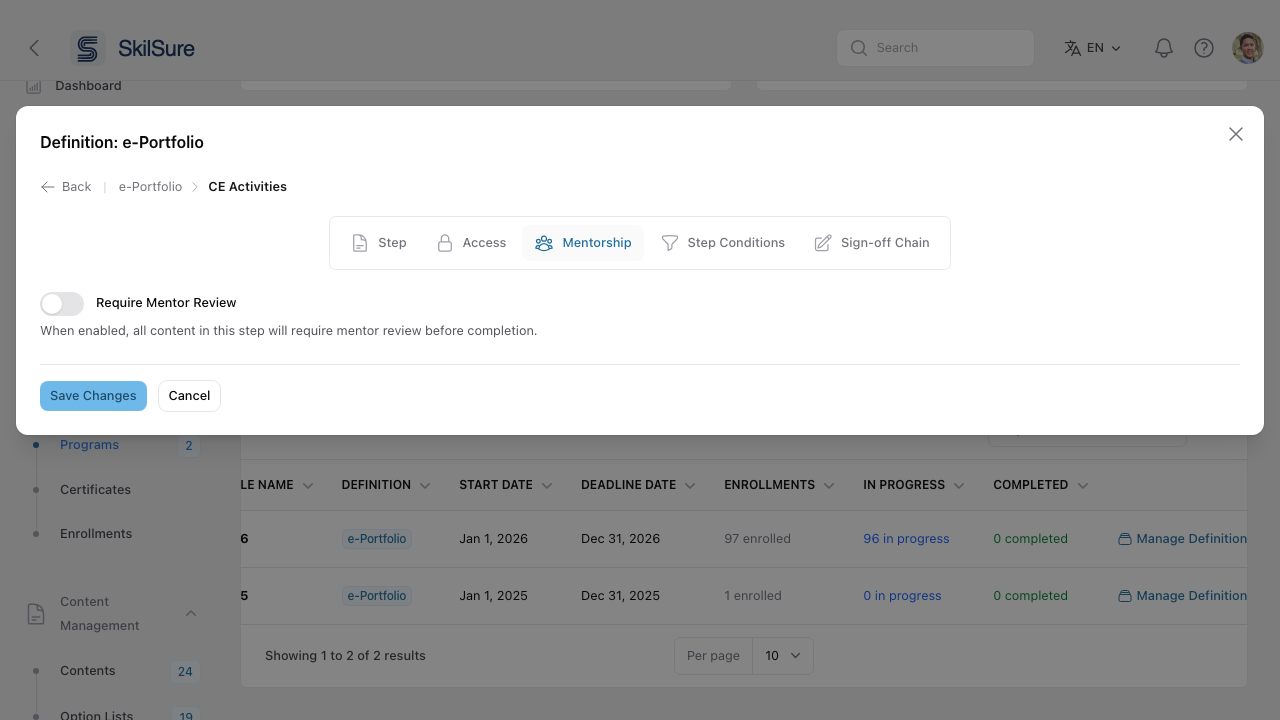 Mentorship tab. When enabled, every content item in this step must be approved by a mentor before completion.
Step Conditions tab — automatic status
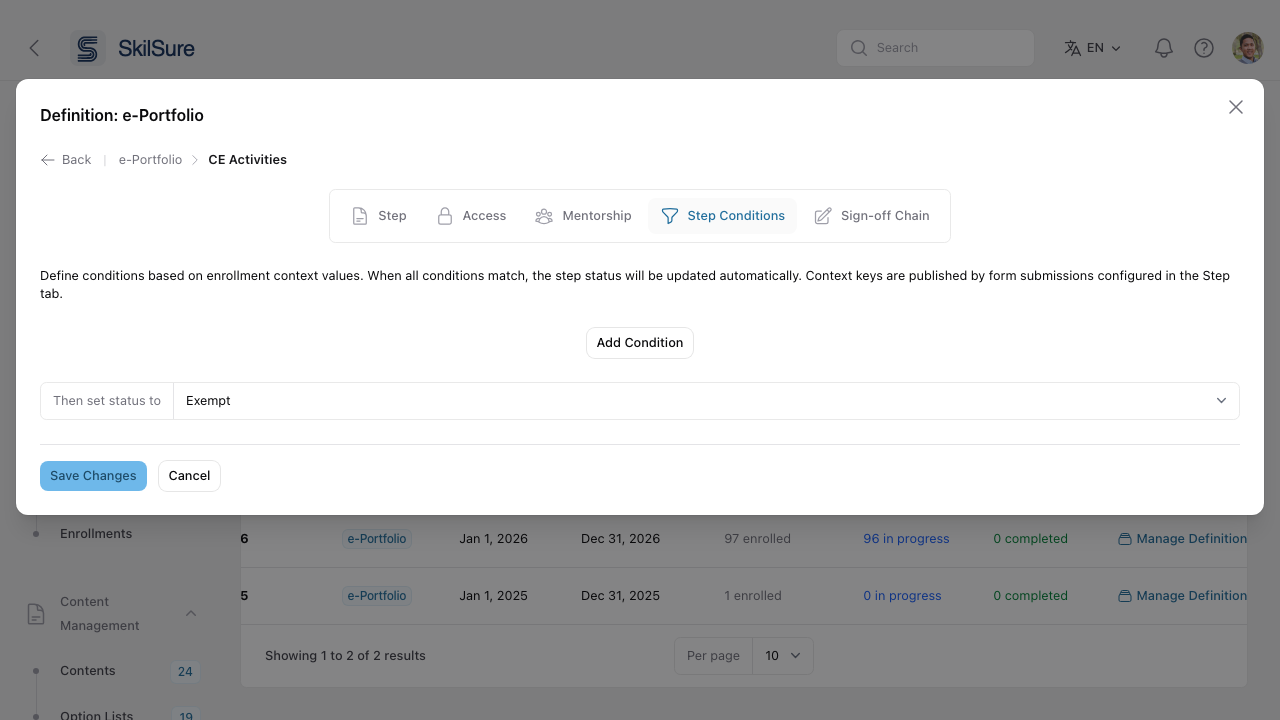 Step Conditions tab. Auto-set a step's status (e.g. Exempt) when enrollment context values match.
Useful for skipping steps that don't apply — e.g. mark the New Hire Orientation step as Exempt for anyone whose context says they've been with the org > 1 year.
Sign-off Chain tab — multi-stage approval
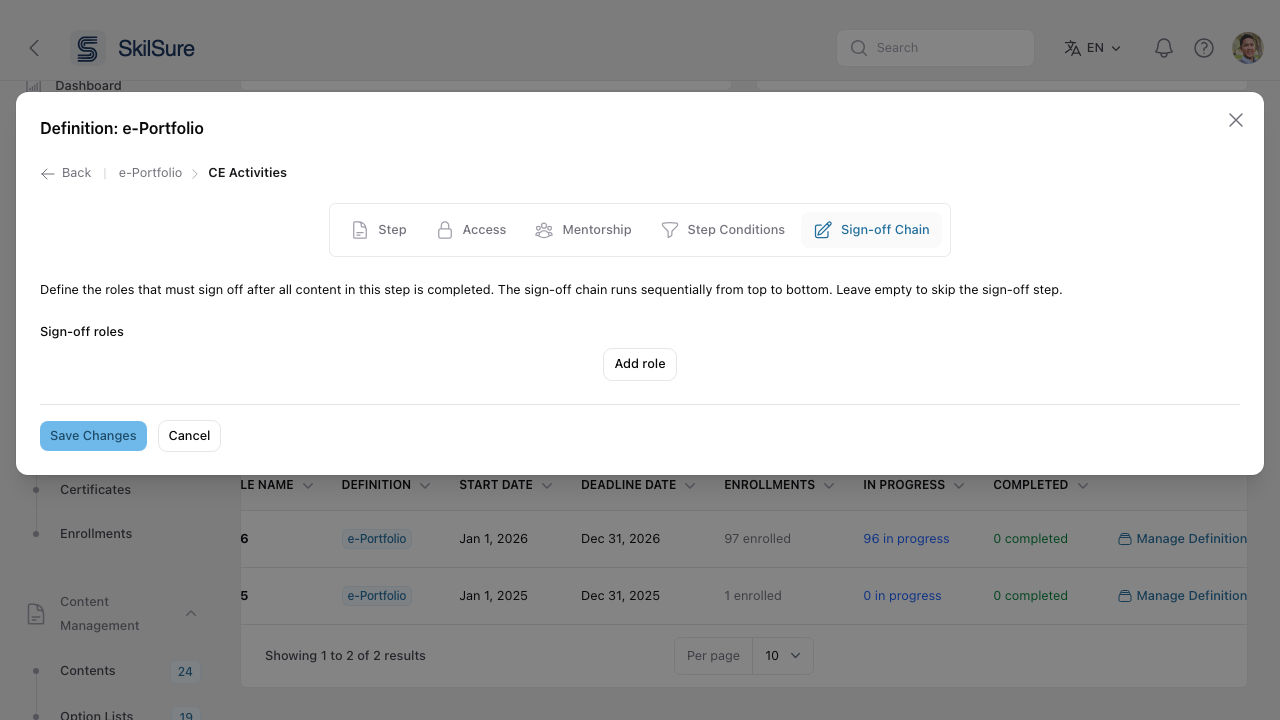 Sign-off Chain tab. Define an ordered list of roles that must each sign off after the user finishes the step.
The chain runs top-to-bottom: the first role signs off, then the second, and so on. Leave it empty to skip sign-off entirely.
Share definitions across cycles
When you create next year's cycle, point it at the same definition. Changes you make to that definition apply to both cycles. Want to evolve the structure without touching the live cohort? Duplicate the definition first, then attach the copy to the new cycle.
Configure a Learning Portfolio step's suggested goals
When a step delivers a Learning Portfolio content that has suggested goals enabled, a Suggested Goals Configuration section appears beneath that content in the Step tab. This is where you decide which competency ratings generate suggested goals for the user — a suggested goal is created automatically when a learner rates a competency at or below a threshold on a Competency Rating step.
The Competency Rating step can live in the same program and cycle as this Learning Portfolio step, or in a different program and cycle — for example, a self-assessment program whose results feed a separate development-planning program.
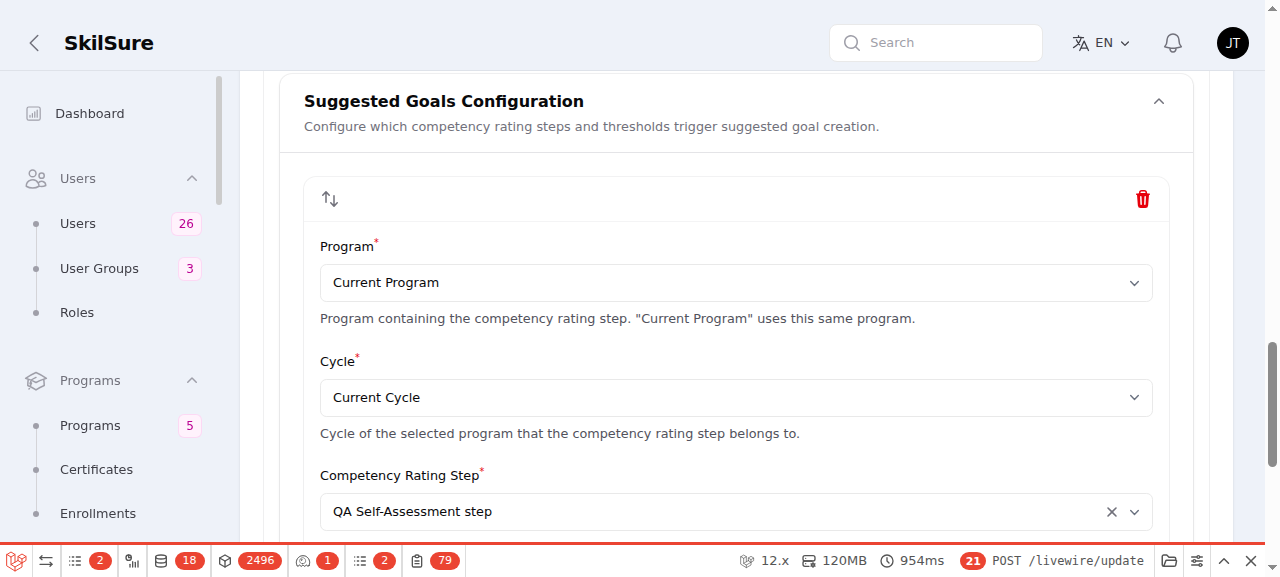 Step tab → Content → Suggested Goals Configuration. Each source row points at the competency-rating step whose low ratings generate goals.
Expand the section and add one or more source rows. Each row defines:
- Program — the program containing the competency-rating step. Choose Current Program to use this same program, or pick another program (the list is limited to programs in the same portal that have competency-rating steps).
- Cycle — the cycle of that program the rating belongs to. Current Cycle is offered only when Program is Current Program; choosing a different program requires picking a specific cycle.
- Competency Rating Step — the step within the chosen program/cycle whose ratings are evaluated.
- Rating Scale — the scale that step rates against.
- Suggest goals at these rating values — the scale values that count as "at or below threshold". A rating at any of these values creates a suggested goal for the matching competency.
The suggested goal's name and description come from the competency's own suggested-goal title and description, and its competency is the one that was rated low — so these are filled in for the user and shown read-only on their side (see working on a suggested goal). Whether these suggested goals are automatically assigned to the user is set by the Required toggle on the Learning Portfolio content itself.
Either order works
A suggested goal is created whether the user completes the competency-rating step before or after they open the portfolio step — SkilSure backfills from an already-completed rating when the portfolio is opened, and pushes new goals when a rating is completed later.